
Sewing vs Iron-On patches is a common dilemma for crafters weighing durability, ease of application, and fabric compatibility. Understanding embroidered patch methods helps you compare how well each approach anchors a patch to denim, canvas, or delicate knits. The durability of patches depends on fabric types for patches and on whether you choose stitching or heat-activated backing. A sewing patches tutorial can be a great resource for beginners to learn backstitch, zigzag, and edge finishing. This guide also weighs iron-on patches pros and cons against sewing options, showing when speed outweighs permanence.
In other words, the choice can be framed as stitching-driven versus heat-activated attachment, two approaches to garment embellishments. The alternative terms for this decision include sewn-on patches, iron-on backings, and adhesive-backed embroidery applied to different fabric types. LSI-friendly concepts include durability under wash cycles, edge finish, and fabric compatibility when evaluating patch application techniques. Consider testing on swatches to observe how stitching tension or heat affects fabric behavior, whether denim, canvas, knits, or blends. Ultimately, the right method matches your project goals, skill level, and how you want the patch to perform over time.
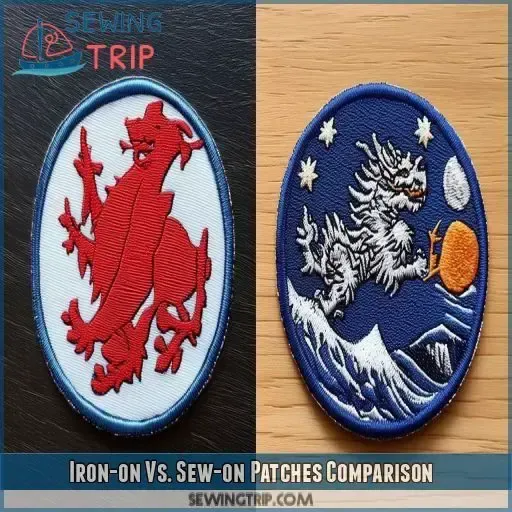
Sewing vs Iron-On patches: A Side-by-Side Comparison
When comparing embroidered patch methods, Sewing vs Iron-On patches differ in attachment, durability, and care. This comparison frames the core decision around how the patch is secured, how it wears through washing, and how easy it is to maintain over time. By weighing factors such as fabric compatibility and end use, you can choose the method that aligns with your project goals.
This side-by-side look highlights practical considerations for different fabrics and wear patterns. It also signals how the choice impacts the final appearance, edge finish, and long term durability of patches. In the context of embroidered patch methods, the decision often comes down to the balance between speed, permanence, and care requirements.
Durability considerations for embroidered patch methods
Durability considerations for embroidered patch methods depend on the patch design, backing, and the fabric it is applied to. High quality embroidery with tight edge stitching tends to resist fraying and edge lift, contributing to a longer lifetime in daily use. Evaluating durability of patches involves looking at how well the patch holds up under washing, abrasion, and repeated flexing.
In practice, sewing patches on heavy fabrics such as denim or canvas generally yields superior endurance in high wear areas. Iron-on patches can also be durable when properly applied, but they require attention to heat exposure and wash cycles to maintain the bond over time. Understanding durability of patches helps set expectations for longevity across different garment types.
Fabric types for patches: matching method to material
Fabric types for patches determine the best securement method. Heavier fabrics like denim and canvas provide a strong anchor for sewing patches, allowing stitches to distribute stress and resist edge curling. The fabric surface also accepts dense stitching that blends with the garment for a clean look.
On lighter or synthetic fabrics, iron-on patches may be a viable option if the heat is controlled and the patch backing is rated for the fabric. In some cases, a reinforcement stitch around the edge improves durability of patches on stretch or knit fabrics, creating a more reliable bond without sacrificing flexibility.
Sewing patches tutorial: techniques, stitches, and setup
Sewing patches tutorial begins with careful prep, including pre washing the fabric, selecting a strong thread, and choosing a needle suited to the material. Common stitch options include backstitch, zigzag, and satin stitches. Each method offers different edge security and aesthetic depending on patch shape and fabric type.
The tutorial continues with precise patch placement, pinning, and edge stitching. A dense satin or zigzag border helps seal the patch against fraying, while extra stitches at the corners prevent lifting. Finishing touches such as a light press and allowing the fabric to cool before handling contribute to a professional and durable result.
Iron-on patches pros and cons and best-use scenarios
Iron-on patches pros and cons emphasize speed and convenience. They are ideal for quick customization on fabrics that tolerate heat and for batch applications where sewing is impractical. This approach aligns with the notion of embroidery patch methods that prioritize fast results and minimal equipment.
The drawbacks include a bond that may weaken with frequent washing or heavy abrasion, and some fabrics may be unsuitable for heat activation. To maximize performance, use iron-on patches on compatible fabrics, follow heat guidelines, and consider reinforcing the edges with light stitching for added durability when the item will see regular use.
Choosing the right method for your project: quick framework
Choosing the right method involves assessing fabric types for patches, expected wear, and care requirements. For heavy fabrics and high wash frequency, sewing patches often provides a robust and lasting bond. For simple projects or quick customization on sturdy materials, iron-on patches can deliver satisfactory results.
Consider whether you will wash the item often, the criticality of edge durability, and your comfort level with sewing. A hybrid approach can work well, applying iron-on patches for speed and reinforcing high wear areas with targeted stitching. This framework, rooted in embroidered patch methods, helps you select the best method for your fabric and project while maintaining control over durability and appearance.
Frequently Asked Questions
Sewing vs Iron-On patches: which method offers greater durability on denim and other heavy fabrics?
Sewing patches generally provide a stronger, longer-lasting bond on heavy fabrics like denim and canvas because stitches resist wear and washing better than heat-activated adhesives. Iron-On patches can be durable with proper prep, but their bond tends to weaken with frequent washing or heat exposure.
What are the iron-on patches pros and cons compared to sewing patches?
Pros: quick application and no sewing skills required. Cons: bond can weaken with washing, heat, or abrasion, and they’re less reliable on stretch fabrics. For durability of patches in everyday wear, sewing patches are typically more dependable.
Sewing patches tutorial: what are the key steps to a lasting bond versus iron-on patches?
Sewing patches tutorial steps include placing the patch, pinning it, stitching around the edge with a straight, backstitch, or zigzag stitch, reinforcing corners, and finishing with a light press. For iron-on patches, prep the surface, cover with a pressing cloth, apply steady heat for the recommended time, and let cool before testing the bond; consider adding a few stitches along the edge for extra durability.
Durability of patches and fabric types for patches: which fabrics favor Sewing vs Iron-On patches?
Heavier fabrics like denim, canvas, and leather favor sewing patches for maximum durability and edge security. Lighter fabrics and blends, or non-absorbent materials, can tolerate iron-on patches if heat settings are correct, though durability may be lower in high-wear areas.
Embroidered patch methods: how do Sewing patches compare to iron-on patches for final appearance?
Sewing patches tend to produce a cleaner, more secure edge and consistent look, especially over time. Iron-On patches look good initially but may show edge lifting or bond changes; finishing stitches around the edge can improve longevity and maintain a neater appearance.
Durability of patches: after multiple washes, which method tends to hold up better, Sewing vs Iron-On patches?
Generally, Sewing patches maintain their bond through repeated wash cycles and abrasion better than iron-on patches, which can soften or lift with exposure to heat and frequent laundering unless reinforced or stitched around the edges.
| Aspect | Sewing Patches | Iron-On Patches |
|---|---|---|
| What it is | Stitch patches to fabric using thread (hand or machine); no heat involved. | Uses a heat-activated adhesive backing that bonds to fabric when pressed with an iron. |
| Attachment mechanism | Thread-based attachment distributes stress and relies on stitched edges. | Adhesive-backed backing activated by heat; bond depends on correct heat, time, and fabric. |
| Materials & tools | Strong thread (polyester, cotton, or heavy-duty blends) and an appropriate needle; pre-wash fabric; stabilizer for delicate/stretchy fabrics. | Adhesive-backed patch, clean iron, pressing cloth, and fabric-compatible heat settings per instructions. |
| Step-by-step (overview) | 1) Position patch and secure with pins/tape. 2) Stitch around edge with straight/backstitch/zigzag close to border. 3) Reinforce corners with extra stitches. 4) Press with low–medium heat and let cool before handling. | 1) Place patch and align. 2) Cover with pressing cloth. 3) Press with steady heat for 15–45 seconds. 4) Cool and test bond; add second heat press or reinforcement stitching if needed. |
| Pros | Very durable; works on a wide range of fabrics; no heat makes it safer for heat-sensitive materials; long-lasting with proper stitching. | Quick to apply; no sewing skill required; convenient for beginners or large batches. |
| Cons | Takes longer to apply; requires sewing skill; visible stitching may show on some fabrics; more time and effort. | Bond can weaken with frequent washing or abrasive use; not ideal for stretch fabrics; edges may lift over time. |
| Durability & care | Tolerates aggressive washing; bond remains strong with proper stitching; best on sturdy fabrics. | Bond depends on heat and fabric; may require gentler washing or air drying; consider reinforcing with stitching for longevity. |
| Fabric compatibility | Denim, canvas, leather, thick cotton; heavy fabrics support sewn attachment well. | Cotton, denim, canvas respond well to heat; nylon/polyester blends may need lower heat or shorter pressing; watch for heat-sensitive fabrics and stretch. |
| When to use (quick guide) | Choose Sewing patches for durability on heavy fabrics, frequent washing, or long-term use. | Choose Iron-On patches for speed, beginner-friendly projects, or when you need a removable/quick customization on sturdy fabrics. |
| Tips for best results | Use color-matched thread, sturdy needle, dense satin/zigzag edge stitching; finish with light pressing; pre-wash helps reduce shrinkage. | Keep surface clean, use a pressing cloth, apply even pressure, and reinforce edges with a few stitches if desired; avoid high heat for delicate fabrics. |
Summary
Table provides a concise side-by-side view of Sewing Patches vs Iron-On Patches, including what they are, how they’re applied, pros/cons, durability and fabric considerations, and practical tips. The content emphasizes choosing the right method based on fabric type, wear expectations, and project goals, aligning with the guide’s theme of comparing embroidered patch methods.